Every day, numerous readers ask us about the recovery of their deleted videos and audios. While no one likes to suffer from an unexpected data loss, chances are that you might encounter the same as well. Therefore, if you don’t want to let go of your precious videos or audios, then keep a video recovery tool handy. It will help you retrieve the deleted content from a data source instantly. In this guide, we will discuss the working of one of these data recovery tools in detail.
The Best Video and Audio Recovery Tool – Wondershare Recoverit
Now, you can easily recover your video and audio files from numerous sources by using Recoverit. Developed by Wondershare, it is one of the most trusted data recovery tools out there. The desktop application is available for leading Windows and Mac systems. It can perform video, photo, and audio recovery under different scenarios like system crash, corrupt storage, malware attack, lost partition, etc.
- Recoverit by Wondershare is available for free and can recover up to 10 files of numerous formats. To recover more than 10 files, you can upgrade to a premium version.
- The tool can recover all kinds of audio and video files in formats like MP3, WAV, MP4, MPEG, AVI, MOV, FLV, and so much more.
- You can preview the recovered content to do a selective restoring of your data.
- The application is easy to use and can recover data from your Windows or Mac’s internal hard drive. Also, you can perform data recovery on sources like SD card, pen drive, MP3 players, external hard disk, etc.
- The tool performs an extensive data recovery and is known to produce one of the highest success rates in the industry.
How to Recover Audio and Video Files using Recoverit?
You can easily get your deleted content back to a secure location using Recoverit. Here’s how you can do audio or video recovery using this amazing tool.
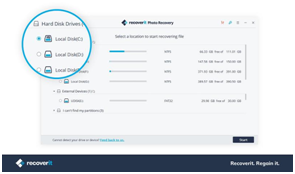
Step 1: Choose a target location
Install Wondershare Recoverit on your Mac or Windows system and launch it to perform data recovery. If you wish to do audio or video recovery on another source (like an SD card or flash drive), then connect it to your system beforehand. From its home, you can select a location to perform data recovery.
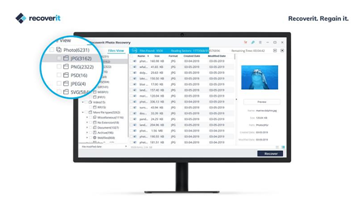
Step 2: Wait for the scan to be completed
Recoverit would extract the lost, deleted, or inaccessible audio and video files from the selected source. Wait for a while for the process to be completed and try not to close the application in between.
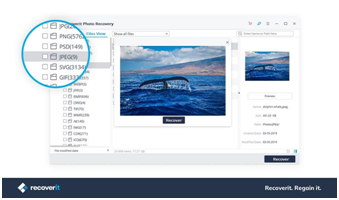
Step 3: Restore your audio and video files
In the end, you can view the retrieved files that would be segregated into different categories for your convenience. You can preview the extracted content here and selectively restore it to a secure location.
Tips to Prevent Your Data from Deletion
Follow these quick tips so that your important audio and video files won’t get deleted again.
- Always maintain a power backup to prevent data loss due to unexpected system shutdown.
- Keep an active anti-malware tool to scan your system on a real-time basis.
- Don’t give permissions to unreliable third-party apps to access your data.
- Try to maintain a second copy of your files as a backup
- Avoid connecting your system or phone to public WiFi as it can infect your data.
- Don’t restart your device while a video or audio is being played.
- Only unmount an SD card safely from a source to avoid data loss
I’m sure that the guide would help you perform audio and video recovery. With the free version of Recoverit, you can restore a maximum of 10 files of every major format. Though, you can always upgrade to its premium version if you want to restore more than 10 files and enjoy its advanced features as well.


